Customized T-shirts, mugs, and caps are so cool.
Watching others wear customized T-shirts and baseball hats and holding their customized coffee mugs, you might wonder how they do it. How do they customize their T-shirts and other stuff?
Well, many online stores allow you to choose a design of your choice, and they print on your desired item. You might even be able to find some local stores offering such customization services. But these services could be costly.
So, you might want to go down the DIY route—using a heat press machine, you can easily create your own customized T-shirts, hats, mugs, and other stuff.
In this guide, we will not only help you choose the best heat press machine for you but also provide guidance on how to use a heat press machine and answer your queries.
So, let’s get pressing!
Table of Contents
How to choose the best heat press for your needs?
Heat press time and temperature setting guide
How to use a heat press step-by-step
FAQs about heat press machine
Conclusion
How to choose the best heat press for your needs?
If you search online or visit your local electronic store, you will find out that there are a litany of heat press machines out there, making it hard to pick the one that will best fit your needs.
Well, below, we have discussed a few factors for you to consider when picking up a heat press machine, ensuring you pick the suitable one for your needs.
1. Heat press type
There are three major types of heat press machines, each offering a unique set of features. So, make sure that you pick the one that best suits your needs. Consider the brief description of each provided below when choosing between different types:
● Clamshell heat press machine
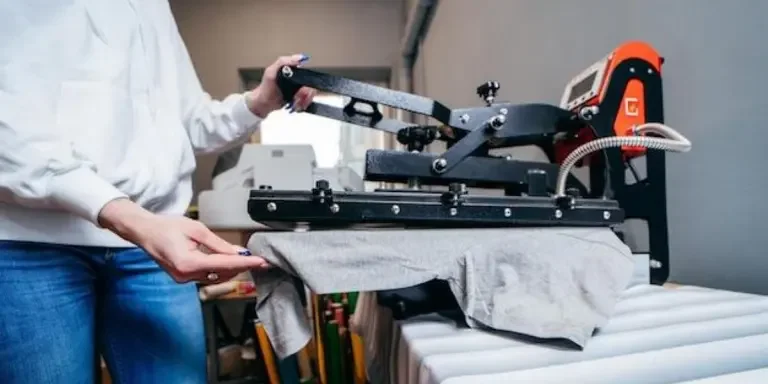
This is the most popular heat press machine. It features two platens—one upper and a lower—and is operated with manual application of downward pressure. These heat presses are highly affordable, easy to use, and store. If you are looking to press plain items such as shirts and bags, get this one.
● Swing-away heat press machines
If you are looking for a bit more versatility and would like to heat press your hoodies and canvas bags, you should consider swing-away heat press models. But know that they take a bit more operation space than clamshells.
● Drawer heat press machines
Drawer heat press machines combine features of both clamshell and swing-away machines. Its lower platen slides out, allowing you to place the thing that you are going to press properly, and the upper platen is quiet like the clamshells, allowing you to manually press to apply pressure.
2. Size of the platen
Besides the type of heat press, you may also want to consider the size of the platens. While a heat press with small platens would work fine for pressing small items such as T-shirts, phone cases, etc., for large items such as blankets, XL T-shirts, or oversized hoodies, you will need a heat press with large platens.
3. Heat distribution
Heat presses are only as good as their heating elements and the evenness of their heat distribution. So make sure that you pick a heat press that offers premium heating elements and evenly distributes heat across the platen.
4. Temperature control
Different items require different heating temperature settings—some are better pressed at higher temperatures, but others might burn at such temperatures. So, make sure that you pick a heat press machine that offers an extended temperature range and also features a digital control panel for easy and precise temperature control.
5. Even pressure
Besides heat distribution, even pressure is also necessary for effective heat pressing. And just like different materials require different temperature settings, pressure settings also vary for different materials. So, look for a heat press with adjustable pressure settings.
6. Safety features
Working with high temperatures and electricity, you always need to put safety first. So, to prevent unforeseen accidents, you must make sure that your heat press offers safety features such as heat-resistant handles and outer surfaces, as well as audible alerts.
7. Brand
Besides the above considerations, you also want to make sure that you get your heat press from a reputable brand like VEVOR. Renowned for its commitment to delivering top-notch equipment and supplies, VEVOR is a trusted and professional brand in the heat press industry. Other than heat press machines, they offer a range of tough tools and equipment–at half the price. For DIY enthusiasts looking to expand their tool collection, VEVOR is a go-to option.
Furthermore, consider checking online reviews and ask your friends and relatives who might be using heat press machines for referrals. Make sure that you get a good bang for your buck.
Heat press time and temperature setting guide
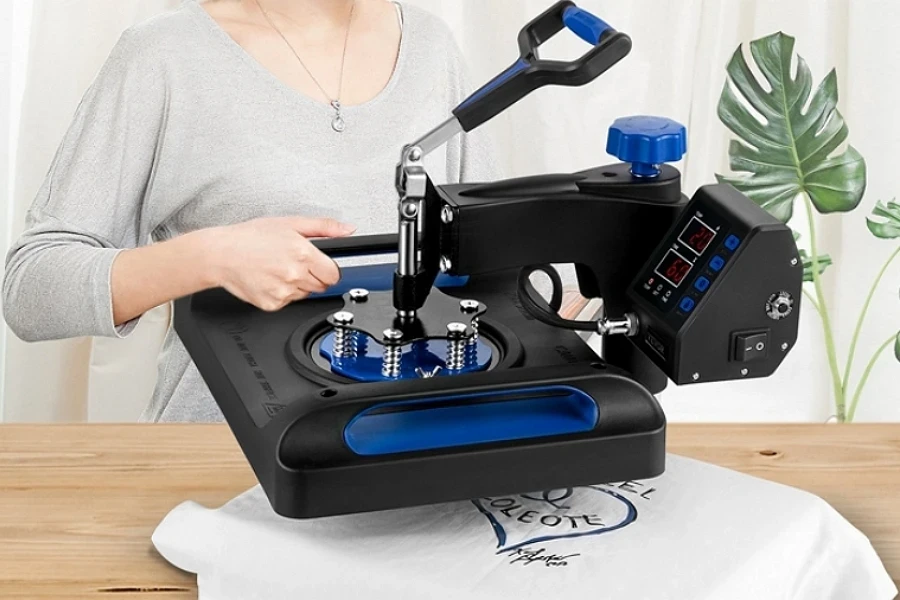
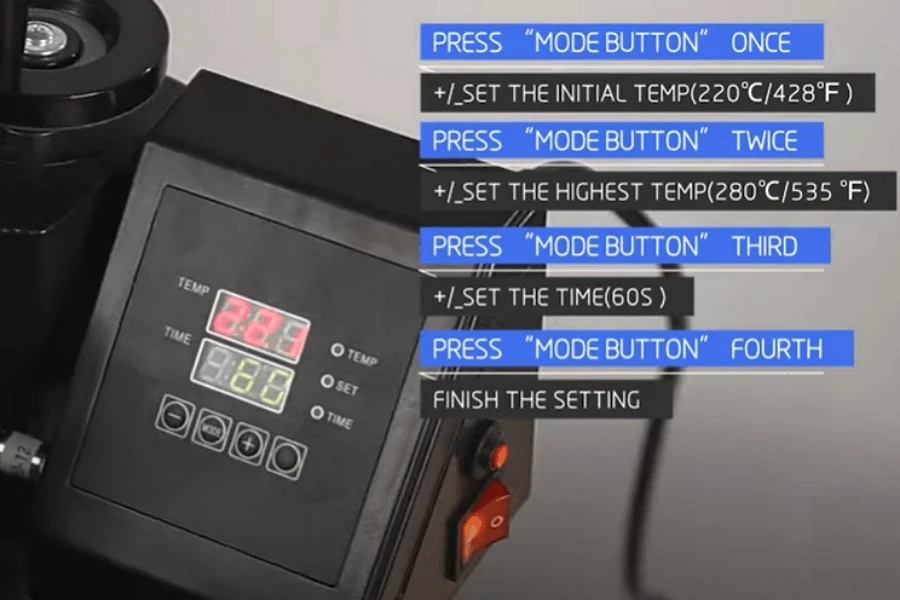
Perfect heat pressing results require optimal time and temperature settings. Different materials—even different thicknesses of the same fabric—require customized heat press time and temperature settings. Similarly, different types also require different settings. So, do not forget to refer to the manual and look for instructions for the sublimation of your particular material.
Here are the heat press temperature and time settings for various materials:
- Cotton: Heat press at 350°F – 400°F for about 15-30 seconds. You might need to adjust timing depending on the thickness of the garment’s fabric.
- Polyester: For polyester items, consider setting temperature at 270°F – 300°F and heat pressing for about 10-15 seconds.
- Spandex: When heat pressing the spandex garment, set the temperature between 335°F – 350°F and pressing time between 10-15 seconds.
- Leather: Temperature anywhere between 300°F – 350°F and pressing time between 15-20 seconds would result in perfect leather heat pressing results.
Pro tips for effective heat pressing results
- Preheat your press for at least 5 minutes for a consistent temperature.
- Place a Teflon sheet over your design to prevent ink bleed and protect the platen.
- Apply medium pressure for most applications. Heavier materials may require slightly more pressure.
- Don’t peel your transfer while it’s hot! Let it cool completely for optimal adhesion.
- Experiment with small test areas before pressing your final project.
- Unsure about specific settings? Err on the side of caution. Lower temperature and time are better than scorching your project with high temperatures and extended, pressing time.
The key to mastering the art of heat pressing is practice and experimentation. So, do not be afraid to test and tinker with heat pressing time and temperature settings until you find the ideal settings for your project.
How to use a heat press step-by-step
Now that you have gotten yourself a heat press machine and learned the importance of heat press time and temperature settings, let’s get some hands-on experience—let’s embark on your first heat press adventure.
Here’s a step-by-step guide to using your heat press like a pro:
Step 1: Gather your supplies
Before you begin operating your heat press machine, make sure that you have gathered all the necessary supplies. You will need sublimation paper, design, or a printer to print desired designs, blanks (T-shirt or other items), a Teflon sheet (optional), heat-resistant gloves, and a weeding tool (for vinyl transfers).
Step 2: Preheat the press
After gathering your supplies, plug in the heat press. Next, set the heat press time and temperature setting suitable for the material that you are planning on pressing. Now, allow the machine to preheat for about 5 minutes.
Step 3: Prepare your item
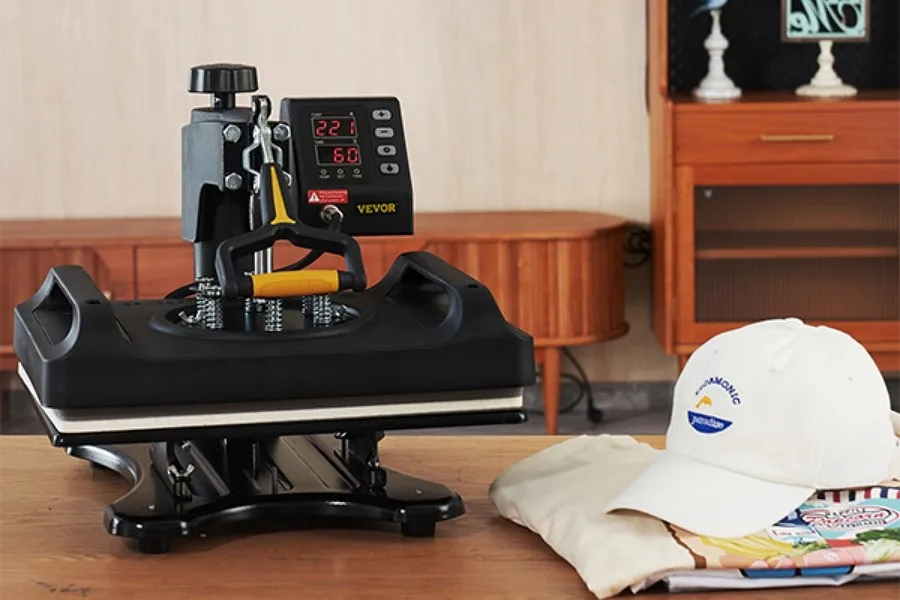
Lay the item that you have to press flat onto the lower plate. Make sure that there are no wrinkles and creases, especially where you are planning on placing the design.
Step 4: Position your design
Now that you have placed the item onto the lower platen, it’s time to place your design in the desired location. Double-check if the design is properly aligned.
Step 5: Cover with Teflon (optional)
To ensure that the bleeding ink does not stick to the press platen, you can consider placing a Teflon sheet over your design.
Step 6: Apply pressure
Double-check if everything is in its place, and then go ahead and close the press and apply moderate pressure. Consult the manual or instructions regarding the material you are pressing about how much pressure you should apply and for how long you should press.
Step 7: Let it cool and peel
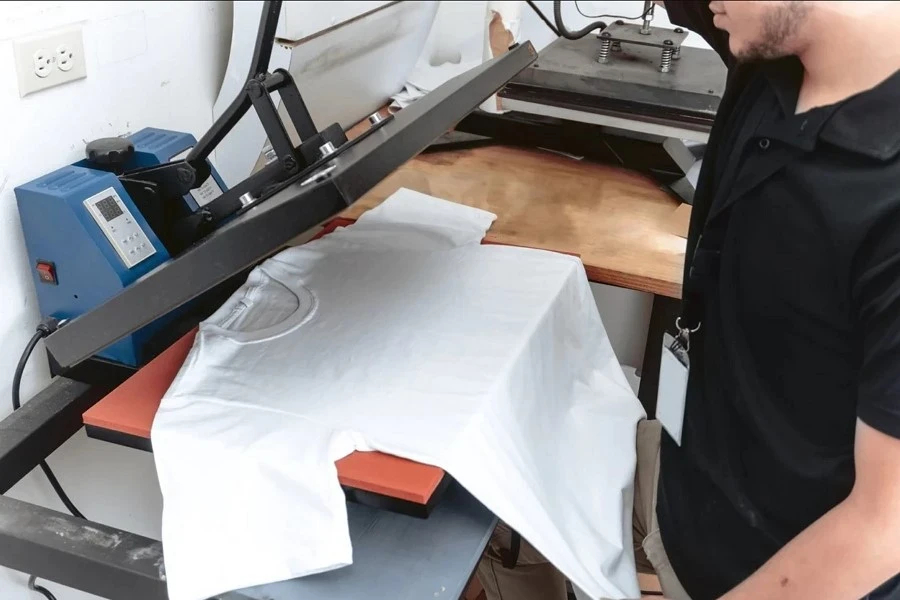
Once the timer goes off (if your press has audible alerts), gently lift the press handle and take out the pressed item. Make sure that you let it completely cool down before peeling the transfer paper.
FAQs about heat press machine
Q: Is a heat press better than iron?
Of course! Although ironing is one way to get the job done, it can be challenging to regulate both the temperature and pressure, which can lead to uneven outcomes. A heat press, on the other hand, applies equal heat and pressure across the surface area, and comes with a control panel to help you adjust the settings for the best possible outcome. Furthermore, heat presses are long-lasting and trustworthy, making them an excellent choice for ensuring consistent and effective results.
Q: Does a heat press use a lot of electricity?
While heat presses do consume a considerable amount of electricity, heat pressure manufactured by reputable brands, such as VEVOR, are highly energy efficient and do not consume much energy once preheated to desired temperatures.
Conclusion
So, there you have it.
Now you can customize your T-shirts and other stuff and make your friends go wow.
Remember that different heat presses are made differently, so consider the factors discussed above to make the right choice and always get your heat press from a reputable brand. Also, different materials require different heat press times and temperature settings.
