
The pictures you take of your products can make all the difference when it comes to getting the attention of your audience and selling your products. If you’re here, you might be thinking you can take quality photos with your iPhone, especially since the camera quality has gotten better. It might take some work, but you absolutely can take great photos of your products to help your brand stand out.
So read on to learn the key points you need to consider to ensure you’re taking top quality product photos on your iPhone.
Table of Contents
Preparing your iPhone
Think lighting
Composition
Props and background
Using accessories and other tools
Editing
Final thoughts
1. Preparing your iPhone
To prepare your iPhone to take quality photos, you need to ensure that both your device and the settings are optimized for photography. To do this you should:
- Update your iPhone: Before you start, ensure your iPhone’s operating system is current. Updates often include improvements to the camera app and its performance.
- Clean the lens: Over time, your camera lens can accumulate smudges, dust, and fingerprints. Use a microfiber cloth or a lens cleaning kit to gently clean the lens.
- Adjust camera settings:
- Set the highest resolution: Go to “Settings” > “Camera” > “Formats” and select “High Efficiency” for the best photo quality.
- Enable grid lines: Turn on grid lines in “Settings” > “Camera” to help with composition and alignment.
- Use auto HDR: Enable Auto HDR (“Settings” > “Camera” > “Auto HDR”) to capture better exposure and detail in challenging lighting conditions.
- Check storage space: Ensure your iPhone has enough available storage for capturing high-resolution photos.
Other iPhone features that can help you take great photos
- Adjust exposure and focus: Tap the area of the screen where you want to adjust focus and exposure. Swipe up or down to manually adjust the exposure if needed.
- Lock focus and exposure: To lock the focus and exposure settings, tap and hold on the screen until you see “AE/AF Lock.” This is particularly useful when you want to maintain consistent settings for a series of shots.
- Use the timer: If you want to reduce camera shake, use the timer function by tapping the timer icon in the camera app to help ensure a steady shot when you press the shutter button.
- Use third-party camera apps: Consider using third-party camera apps like ProCam or Camera+ that offer more advanced manual controls for photography.
- Save in RAW Format (if available): If you have a newer iPhone model (12 or newer Pro or Pro Max model), consider capturing photos in RAW format (ProRAW) for greater post-processing flexibility and image quality.
Also, avoid using digital zoom as it reduces image quality. Instead, physically move closer to your subject for a better shot.
2. Think lighting
When it comes to product photography, like any photography, lighting is critical. Lighting is the key to enhancing the fine details, textures, and features of your products, making them shine in your images. Additionally, proper lighting is essential for accurately depicting the true colors of your items, preventing any unwelcome surprises for your customers.
Lighting also sets the mood for your product photos; whether it’s a soft, inviting glow or a dramatic play of light, it can convey a specific atmosphere.
Lastly, high-quality, well-lit product photos boost sales by instilling trust and confidence in potential customers. In the competitive world of e-commerce, where visuals reign supreme, nailing your product photography lighting is a game-changer for your business’s success.
What’s the best lighting for product photography?
The best lighting for taking product photos on an iPhone depends on the type of product and the mood you want to convey. Here are some lighting options to consider:
Natural light
- Indirect natural light: Soft, indirect natural light from a window or diffused by a sheer curtain is excellent for most product photography. It minimizes harsh shadows and provides even illumination.
- Golden hour: Early morning or late afternoon sunlight during the “golden hour” creates warm, soft, and flattering light. It’s great for products with reflective surfaces or needing to convey a warm, inviting atmosphere.
Artificial light
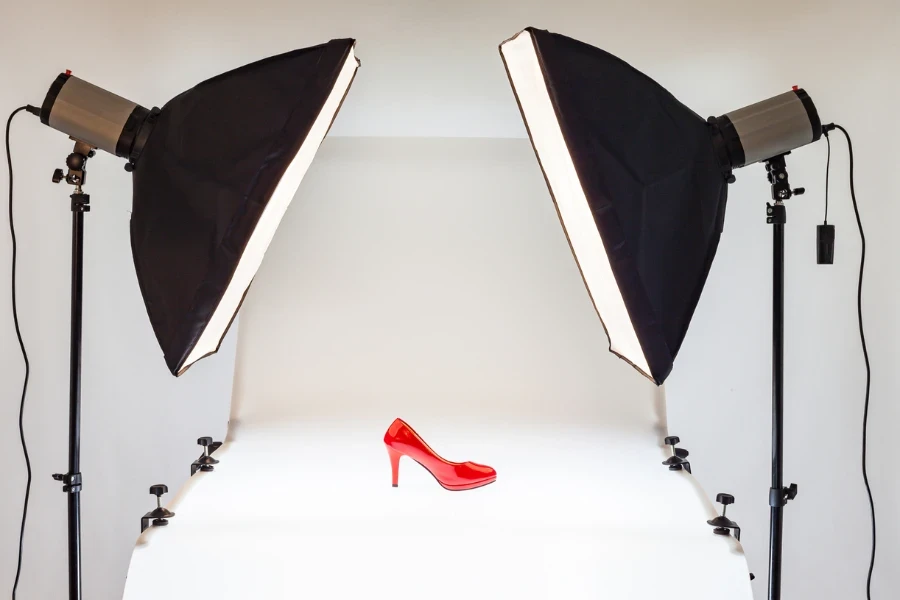
- Lightbox or softbox: A lightbox or softbox provides diffused, even lighting that minimizes shadows and highlights the details of your product. These are particularly useful for small items like jewelry, cosmetics, and electronics.
- Ring light: A ring light can create even, shadowless lighting with a soft, flattering glow, making it great for beauty products, fashion items, and portraits.
- LED panels: LED panels offer adjustable brightness and color temperature, making them versatile for various products. They are excellent for consistent and color-accurate lighting.
- Tabletop studio lighting kit: These kits are designed for product photography, providing various lighting options and backdrops for a controlled shooting environment.
There are a few other things to consider when it comes to lighting for product photography. When you are taking photos for your blog or social media platforms, you can experiment with lighting and composition; however, when you’re taking pictures for your product page, you want your photos to be consistent. Consistency is crucial for maintaining a cohesive look on the product section of your website.
So, for product page photos, try to avoid mixing different light sources with varying color temperatures, as this can lead to color imbalances in your photos and stick to one type of lighting source for a uniform look.
Other accessories that can help achieve the best lighting
- Reflectors: Use white or silver reflectors to bounce light onto your product and fill in shadows to help balance the exposure and reduce harsh shadows.
- Black foam board: Placing black foam board on one side of your product can create dramatic, moody lighting by absorbing light and emphasizing contrast.
- Diffusion material: Attach diffusion material like a sheet or fabric between your product and the light source to soften and spread the light.
3. Composition
Composition in product photography refers to the arrangement and positioning of various elements within the frame to create visually appealing and compelling product images. But why does that matter?
A product photo not only needs to be visually appealing, but a well-composed photo can convey its purpose and benefits. So, it not only grabs the attention of potential customers but helps to tell the story of the product.
Here are the most important composition techniques to consider when taking product photos.
Framing
Use framing elements, such as doorways, windows, or other objects, to enclose your product within the image. Framing draws the viewer’s attention to the subject and can add depth and context.
Rule of thirds

Divide your frame into a 3×3 grid, and position key elements, such as the main subject or important details, along the lines or at their intersections to add balance and visual interest to your photo.
For this to be effective, you need to determine the focal point of your image. For product photos on your project page, this is likely the product itself; however, for product photos on social media or other places, you may want to focus on different brand elements like packaging.
Reminder: On an iPhone, you can turn on the grid to see these lines visually when taking a picture.
Leading lines
Utilize leading lines in your composition to guide the viewer’s eye toward the product. Leading lines can be natural elements, like roads or paths, or even created using props or objects. For example, in the photo below, the triangle prop brings your eye toward the product.
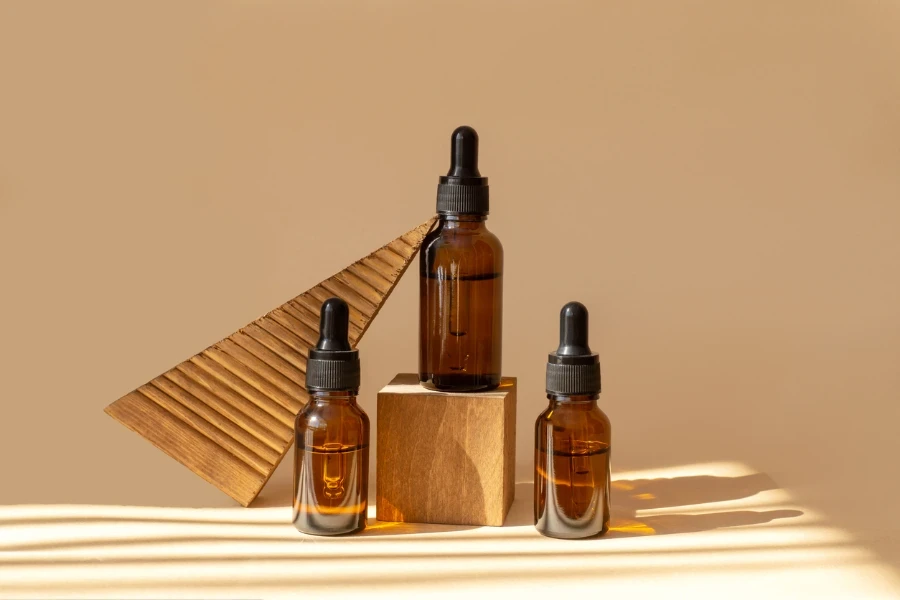
The use of diagonal lines is a great way to add visual movement to the image. This type of visual movement encourages the viewer to move through the entire frame of the image and examine the whole scene.
Consider depth
Newer iPhones have portrait mode, which automatically allows you to focus on one particular element of a photo while blurring the background. Consider interesting ways you can use this feature to add depth to your image to make it more interesting and to provide additional content to the image.
Other things to consider when it comes to composition
- Angles and perspectives: Experiment with different shooting angles and perspectives to highlight unique features of the product. Consider capturing the product from eye level, overhead, or at a slight angle. Find the angle that best showcases the product’s form and functionality.
- Negative space: Embrace negative space, which is the empty or unoccupied area in your photo. Negative space can create a sense of balance, simplicity, and elegance. It also allows for flexibility when adding text or graphics for marketing purposes.
- Symmetry and patterns: Symmetry and repeating patterns can be visually appealing in product photography. Aligning your product symmetrically or capturing it within a pattern can be captivating and convey a sense of order.
- Balance and harmony: Strive for balance and harmony in your composition. Avoid clutter and maintain a sense of order by arranging elements intentionally within the frame.
For groups of products, always use an odd number. There is no real consensus on why this works, but it does.
Remember that effective composition and framing can make a significant difference in how your products are perceived and how they engage potential customers. It’s an art that evolves with practice and creative exploration, so take your time and try many different things, and you will figure out what works best for your product.
Remember to use your body to zoom. The digital zoom on your iPhone will negatively impact your image, so always get closer rather than zooming in.
4. Props and background
The background in a product photo can be an important element in image composition as it can be used to frame the image effectively. That being said, the background can also play a critical role in telling the story of the product or your brand. For example, in the product photo below, they used lavender and orange in the background to show some of the ingredients used in the product.
As previously mentioned, product photos for the product page typically show the product by itself on a neutral background; however, there is room to play with backgrounds on images for other locations on your website and other platforms, like social media.
Choose a background that complements your product and doesn’t distract from it. Clean, uncluttered backgrounds or relevant settings often work well. You can use plain surfaces, textured materials, or complementary props to enhance the product’s story.
If you are considering using these photos in many locations, it can also be wise to consider editing and graphics. For example, you may want to add text to the image to add context, so consider this when setting up your image and deciding on the background.
Don’t be afraid to experiment with different backgrounds. Take test shots with a few options to see which complements your product best.
5. Using accessories and other tools
Of course, some popular accessories can help people take better product photos:
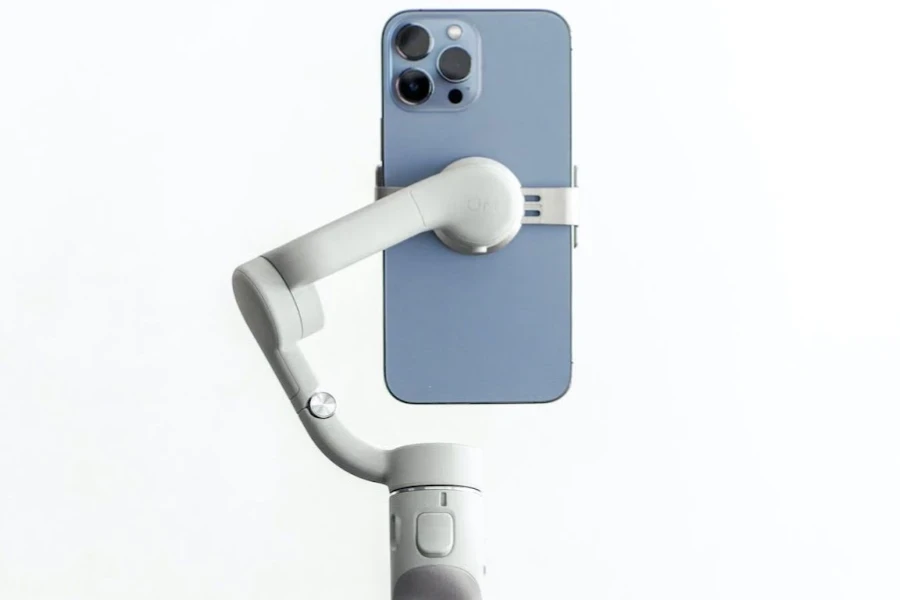
- Tripod: A stable tripod or smartphone mount ensures a steady shot, reducing the risk of camera shake.
- Remote shutter release: A Bluetooth or wired remote allows you to trigger the camera without physically touching the iPhone, further reducing the risk of camera shake. This is especially useful for capturing long-exposure shots.
- Lens attachments: Various clip-on lenses, such as macro, wide-angle, and fisheye lenses, can extend the capabilities of your iPhone camera. They enable close-ups, group shots, and creative effects that enhance product photography.
- Cleaning kits: Keeping your iPhone lens clean is essential for producing clear and sharp product photos. A cleaning kit with a microfiber cloth and lens cleaner can help maintain image quality. You may also want to consider a lens protector.
- Color checker cards: Color calibration tools, like X-Rite ColorChecker cards, ensure accurate color representation in your photos. They are handy for e-commerce product photography, where color accuracy is essential.
It’s essential to select the accessories that best suit your needs and the types of products you photograph, whether jewelry, fashion, food, electronics, or any other category.
6. Editing
Photo editing can make all the difference, but if you’re just starting out, it can seem intimidating. Looking for some photo editing apps to learn? Check out these great apps for iOS.
Final thoughts
With these tips, you don’t necessarily need to hire a photographer to take the product photos for your business, but it will take some practice to figure out how to get the best photos. Don’t be afraid to experiment with lighting, lines, focus and backgrounds to figure out what works best and keep your brand image in mind — your product photos should help tell a story.